Showing posts with label Tutorials. Show all posts

Tweet Tweet

February 19, 2011


I recently joined Twitter! I know, I'm a little behind the game.
The reason I haven't signed up before was that I  didn't get twitter.
The whole thing didn't make sense!

Then I read a little article that explained twitter in my kind of language. Basic.
So for all you your tweeting pro's please ignore my sillly explanation.
This is by no means the full twitter low down.
Just a little synopsis for anyone who may be in that same boat I was.

my twitter interpretation 101:

Twitter is like one big giant party.
Everyone is in the same room.
When you tweet you are talking loud enough for everyone to hear.
When you want to talk to the person standing right next to you, or whisper in someones ear you add their name. You mention them. You do that by adding their twitter name.
Example: @keylimedigital this is a silly little explanation! 
Keep in mind, whenever you are having a conversation at a party, anyone could be listening.

Now lets say you want to talk to someone privately.
You need to talk to them in the hall. You add a "d" before their twitter name to talk to them directly.
Example: d @keylimedigital you are crazy!
 And there you go, enjoy the party! Be Social! Tweet Tweet!

Are you on twitter? 

Just for a little fun.... if you  follow me on twitter you will entered to win a FREE custom digital invitation. It can be a birthday invite, baby announcement, party invite, ect...

Giveaway good through monday! And of course, the winner will be announced on twitter!

PS. This is not the  *awesome tutorial* I mentioned in the last post. It's still in the draft stage.

Busy + New Designs

February 17, 2011

These Days We are a little busy.... school, moving {not the BIG move yet, a smaller one but a move no matter} school, playing with sophie {recently learned to "dip" her french fries in ketchup and drink HiC from a straw} and lots of custom design work! Check out a few of the recent custom designs....


Our Cooking Cafe is fully of YUMMY recipes! 

Emily just opened a Etsy!
Her Mom also has a Etsy with Beautiful Art!


And finally took a min and made myself a new button. Feel free to grab it! :)


A super COOL blog tutorials is coming up next!

Fancing a Font

January 28, 2011

I don't know about you but I tend to seriously fall-in-crush with fonts. I'm sure you have noticed. I find a font I love, then use it on about every design I do for a whole month. Then find another font. Repeat. My newest crush....

Gimp: Pictures in a Collage

October 27, 2010

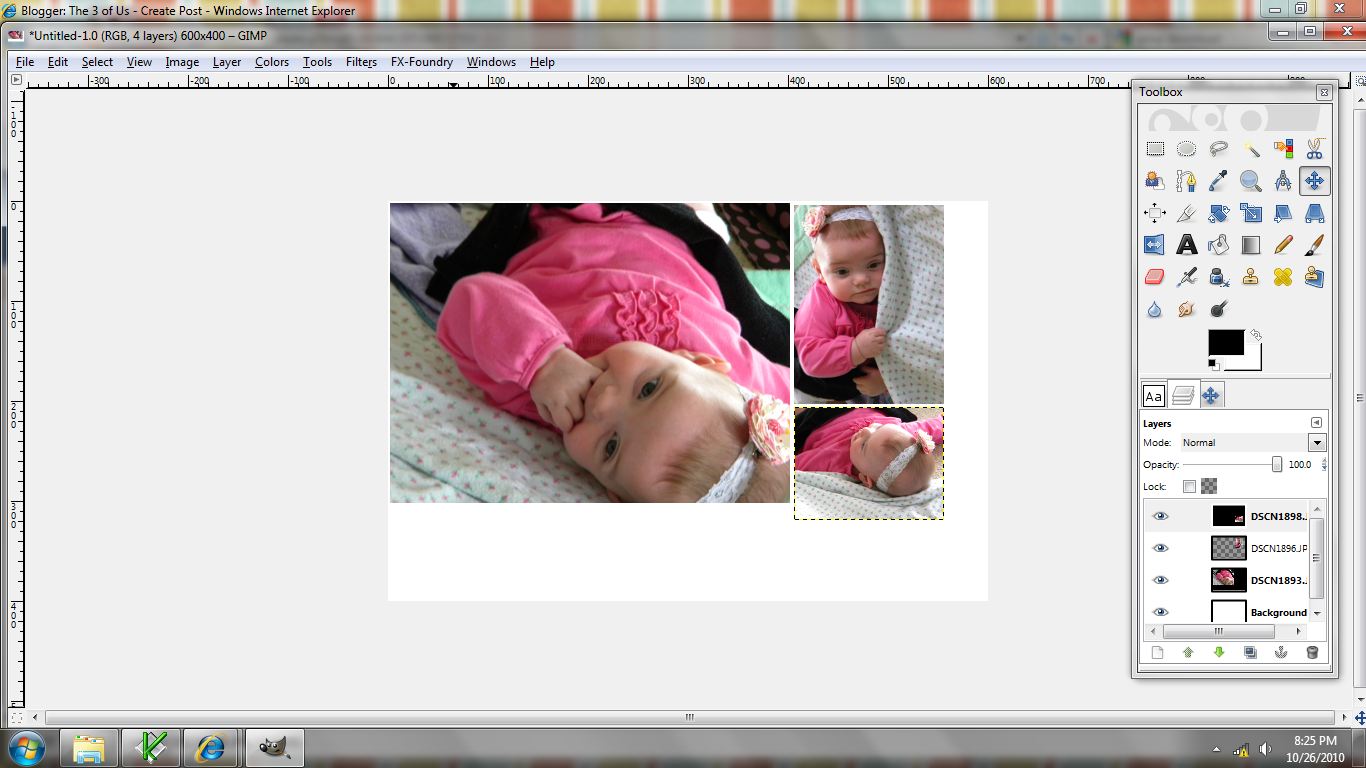
Yesterday I posted about our weekend. I used Gimp to make a picture collage of sorts. I had a few people ask me how I made it. I would love to share with you....

First you are going to need to download the Gimp program {it's free!} if you don't have it already. Gimp is a program similar to photoshop, in that you use layers.

Download it:

Now lets get started!
                                        You can click on any picture you see it bigger.


Open Gimp > File > New > Set Width and Height to whatever size you want. I am going to use 600 x 400. Change the x and y resolution to 300. Set "fill with" to background color.


Now go to file > open as layer. Find the first picture you want to use and push ok.
Your picture will probably be huge.


Now click on the "layers tab" on the tool panel.

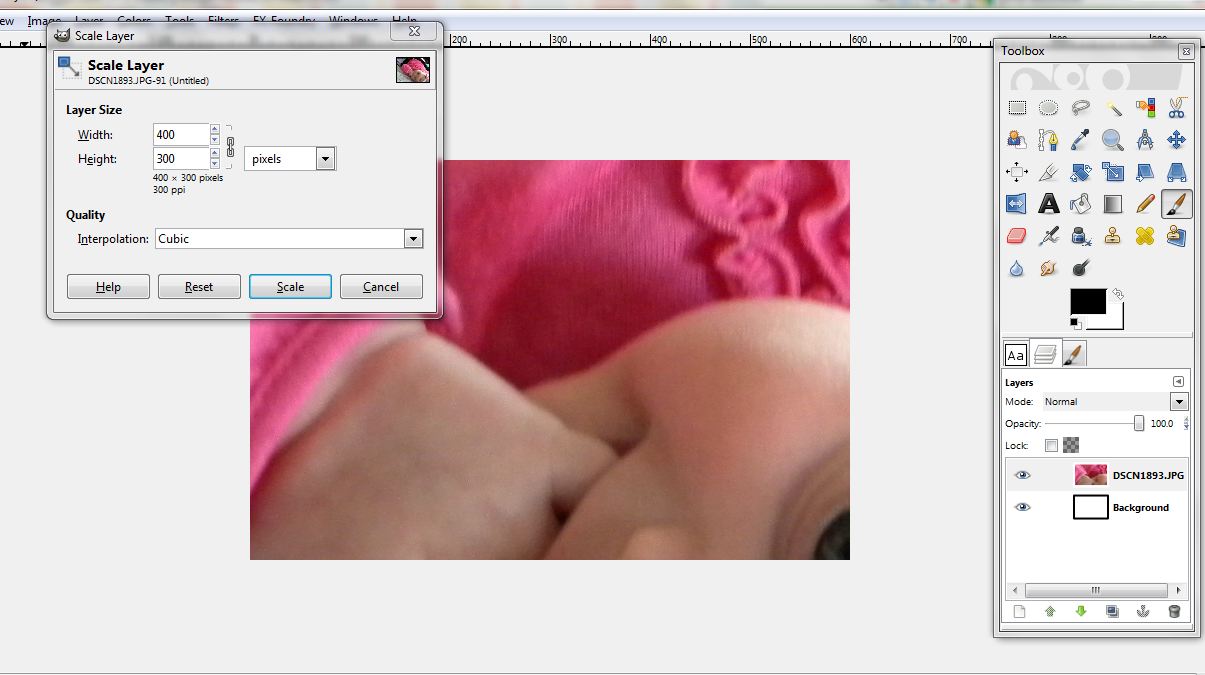
Now right click on the layer that has your picture. Choose "scale layer"

Change the width to 400. When you click in the height box it will automatically adjust to keep the right proportions for your picture.
The press scale.

Now we need to move the picture to where we want it.
We need to select the "move" icon in the toolbar.


Now click on you picture and drag it to where you want it.


Now I am going to open another picture.
File > Open as Layer > Add your picture.

Then right click on the layer > scale layer.
This time I am going to make the width 200 and the height 150.


I want my picture to be rotated so I am going to click the "rotate tool"

Click on the picture. This box will pop up.
Rotate -90 degrees.


Now move the picture {click the move tool}

Now open your next picture.
File > open as layer.
Right click on the layer > scale layer
This time I am doing width: 100 and height: 113

Now I am going to use the "crop tool" to cut off the extra background space.

Now use the cursor to highlight the area you want to keep.


Then click inside the area you are keeping.


Now let's add some text! Click the "text tool"


Now click and make a box. It doesn't matter where it is or how big it is.


Type your text.


You can change the font by clicking the tab that has "Aa"
Once you pick your font you can change the size by clicking back on the "text tab"


You can move your text by clicking and dragging.


Now I am going to make one final crop.


Ta da! Now you have a picture collage.

To save:
File > Save As >
type your file name and add .jpg to the end

There are so many ways to use gimp!
Experiment & have fun!

If you have any questions or get stuck at all leave a comment or email me.